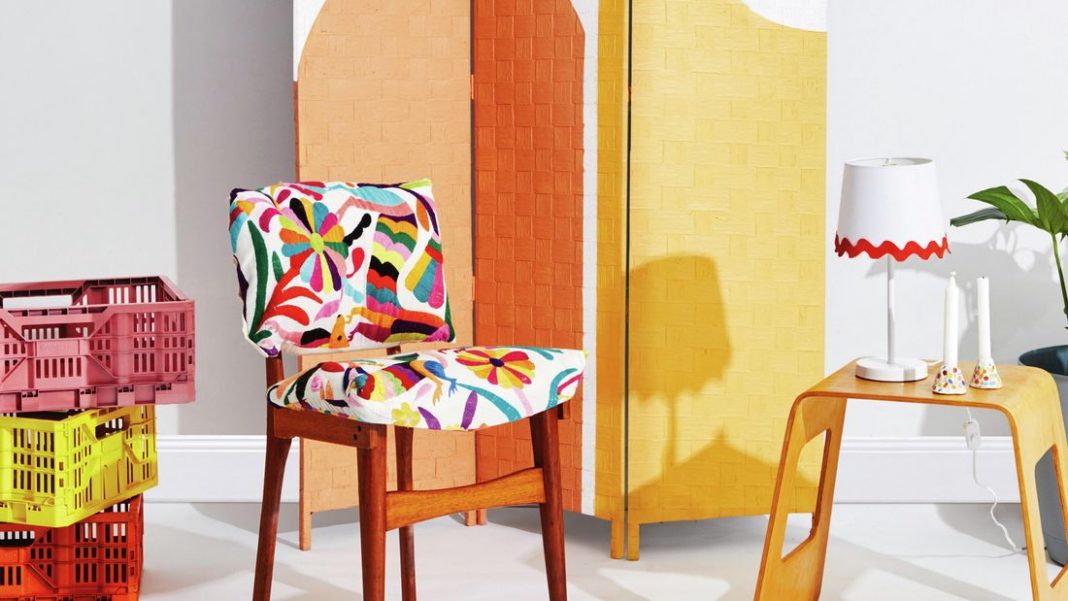
Upcycling is on the rise as Aussies look for cost effective ways to bring some individuality into their homes. A recent survey by Bunnings has revealed that the majority of Australians (78 per cent) are upcycling – a jump of almost 20 per cent compared to the 59 per cent of Aussies who were picking up the tools to turn trash into treasure this time last year.
Australians are now more cost conscious than ever, with saving money a top reason for completing an upcycling project (55 per cent) and six in 10 (61 per cent) motivated by the sense of achievement they feel completing their project.
Others are looking to jump on the trend to reduce their environmental impact, with over half (53 per cent) of Aussies taking to the trend in the name of sustainability. This is prompting many to revamp old items around their home (72 per cent), while more than a third (35 per cent) are rescuing items from hard rubbish, and another quarter (27 per cent) are turning to op shops to find a gem in need of a little TLC.
Serial renovator Claire O’Connell is no stranger to DIY and upcycling, most recently transforming a second-hand cabinet from the Salvos into a community library for her local kinder. “There is something wonderful in taking an old, discarded piece of furniture and giving it a new lease on life,” says Claire.
Bunnings Workshop DIY Expert, Mitch Mclean, shares his top three tips for mastering the upcycling trend.
1. Get planning
Completing a project requires some planning, including research and sourcing the right tools and materials you might need. Pinterest, TikTok and Instagram offer a wealth of inspiration and creative ideas. Once you have done some proper planning and prep, you will have a clear vision of how you want your piece to turn out which will help minimise mishaps when tackling the project.
Do you have a chair that needs reupholstering? Keep scrolling for a no-sew DIY.
2. Remember your motivation
Finding a purpose for your project is a great way to spark inspiration and help keep you motivated to finish it. Many Aussies (44 per cent) are more likely to complete a DIY project for someone else than they are themselves. A good way to tackle the ‘slow days’ is to divide your project into sections, and only move on to the next part of the project if you finish the first one.
3. Start small
Upcycling can be as simple as giving an old vase a new lease on life with a coat of paint. If you’re a DIY novice, revamping a second-hand find is a great place to start as it’s budget friendly and doesn’t need to be perfect, which is part of the fun. Many find inspiration in the old items they already have at home. Research shows the most popular picks to upcycle are tables, chairs, pots, cupboards and drawers.
How to upcycle a chair without sewing
Soften the lines of a classic mid-century dining chair with look-at-me upholstery: a cheat’s version made from repurposed cushions.
You will need
- 120-grit metal sanding sheet
- 240-grit abrasive paper
- Clean cloths
- Cushion covers to fit your chair
- Cushion insert
- Disposable gloves
- Drop sheet
- Liquid beeswax
- Masking tape
- Mini paint roller kit
- Quick Grip 50mm spring clamps
- Rust converter – Bondall Ranex – Rustbuster rust converter was used here
- Safety equipment
- Screwdriver
- Spray paint – Dulux – Metalshield epoxy enamel spray paint in Flat White was used here
- Stapler
Step-by-step guide
- Disassemble the chair
Working on a drop sheet, remove the seat and back. Use a screwdriver to loosen the screws from the frame.
Tip: Treat rusty screws with rust converter to reuse when reassembling the chair. - Paint the ferrules
Wear gloves, glasses and a mask suitable for sanding and painting. To paint the metal chair tips (ferrules), apply tape around the timber legs and lightly sand the ferrules with 120-grit metal abrasive paper. Wipe clean. Spray the ferrules with white paint, holding a cardboard offcut behind to avoid overspray. Apply two coats, leave to dry after each. - Sand the timber
Remove tape and smooth over the timber frame with 240-grit abrasive paper. Wipe clean with a damp cloth. - Apply beeswax
Apply liquid beeswax over the frame using a clean cloth. Leave to dry for half an hour then buff all over in a circular motion with another clean cloth. - Add cushion covers
Position cushion covers over the seat and backrest. Cut open a cushion insert and use the stuffing to pad inside the covers. Fold the covers towards the underside of the seat and rear of the backrest, clamping with spring clamps. Staple the open edges of the covers to the underside of the seat and rear of the backrest. - Reassemble the chair
Find the screw holes under the seat and at the rear of the backrest, marking them with a pen. Reassemble the chair by pushing the screws through the holes in the frame and the fabric, tightening them into the seat and backrest with a screwdriver.
Get local, national and world news, plus sport, entertainment, lifestyle, competitions and more delivered straight to your inbox with the Canberra Daily newsletter. Sign up here.


