
Does all the talk of Barbies have anyone else tempted to crack out their old tea set? You can host a grown-up tea party for your loved ones with these delightfully nostalgic recipes.
Nostalgic finger buns
Makes 12
- 4 cups (550g) bread flour
- 1/3 cup (75g) caster sugar
- 1/4 cup (60g) butter, softened
- 2 eggs, at room temperature
- 4 tsp (14g) yeast
- Pinch of salt
- 150ml milk, at room temperature
- 150ml water
- Vegetable oil spray
For the egg wash
- 1 egg
- 1 tsp milk
For the filling
- 1 serving berry jam
- 1 serving pastry cream or whipped cream
- 1/2 cup (70g) icing sugar
To start the dough, sift the flour into a large mixing bowl, then add the sugar, butter, eggs, yeast, salt, milk and water. Stir with a wooden spoon until a dough ball begins to form.
Turn the dough out onto a lightly floured work surface. Knead for 10 minutes, or until the dough has a smooth surface and springs back when it is poked. Place the dough in a lightly greased mixing bowl, then cover it with a damp tea towel. Leave the dough to double in size, which will take about 1 hour.
Roll the dough into a log about 30cm long, then cut it into twelve portions. (First divide the log into three even parts, then cut each of the thirds in half, and finish by cutting each of those six pieces in half again.) Roll them into balls. Roll one side of each ball to form a little finger at least 10cm long.
Place the fingers on a lined baking tray. Either brush or spray them with oil, then cover them with a damp tea towel and leave them until they become plump and fluffy, about 40 minutes.
Whilst the dough is rising, preheat the oven to 235°C. In a bowl, whisk together your egg wash until there are no lumps of egg white remaining. When the dough has risen, lightly brush each finger with the egg wash, then place the tray in the oven for 10 to 15 minutes, or until the fingers are evenly golden and cooked through. Set them on a wire rack to cool.
Cut each finger bun horizontally, then fill it with your choice of jam or cream. Dust it lightly with icing sugar before serving.
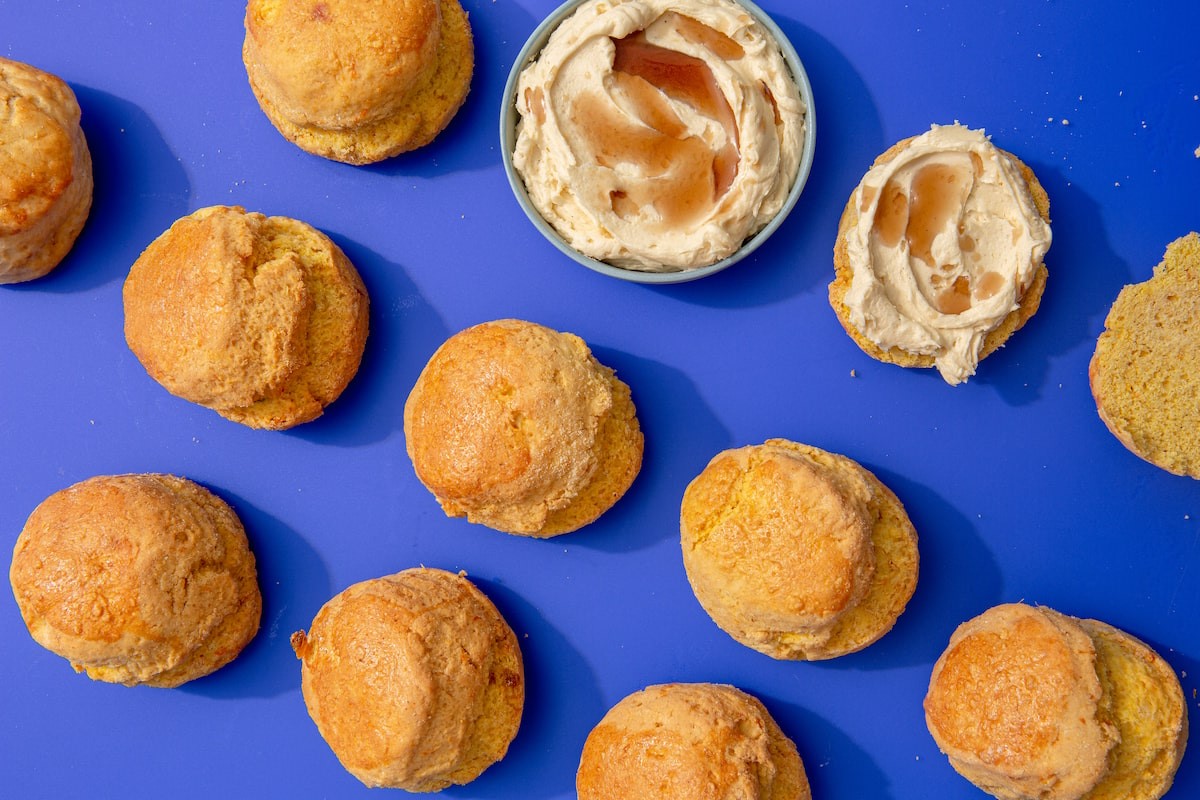
Nan’s pumpkin scones with whipped maple butter
Makes 8
- 1/2 cup (120g) butter, at room temperature
- 1/2 cup (110g) caster sugar
- 2 eggs, at room temperature
- 1/2 cup (120g) pureed cooked pumpkin
- 3 cups (375g) self-rising flour
For the whipped maple butter
- 2/3 cup (150g) butter
- 1/3 cup (80ml) maple syrup
- Pinch of salt
For the scones, use a large mixing bowl and beat the butter and sugar with an electric mixer until light and pale. Add the eggs one at a time and beat until each egg is fully incorporated. Now stir in the pumpkin, then sift in the self-rising flour. Switch to a butterknife and mix the ingredients with it until the scone dough comes together (see tip). Turn out the dough onto a lightly floured work surface, then very lightly knead the dough for about two or three turns, or until it just comes together.
Roll the dough into an even thickness of about 5cm. To shape the scones, use a 5cm ring cutter. Ensure you dip the cutter into flour each time you shape a scone to keep the dough from sticking.
Position the scones on a baking tray so that they are just touching each other. Now put them into the oven for 15 minutes, or until they are golden.
Whilst the scones are baking, make the whipped maple butter. In a large mixing bowl, beat the butter with an electric mixer on a medium-high speed until it is light and fluffy. Add the maple syrup and salt and beat again on a medium-high speed until well combined.
Serve the whipped maple butter with the warm scones fresh out of the oven.
Hot tip: When making scones it is best to work the dough with a butter knife rather than a spoon. This will prevent the dough from being overworked as the knife cuts through the flour whilst combining the ingredients.
Get all the latest Canberra news, sport, entertainment, lifestyle, competitions and more delivered straight to your inbox with the Canberra Daily Daily Newsletter. Sign up here.

